How to install and debug banana vibrating screen
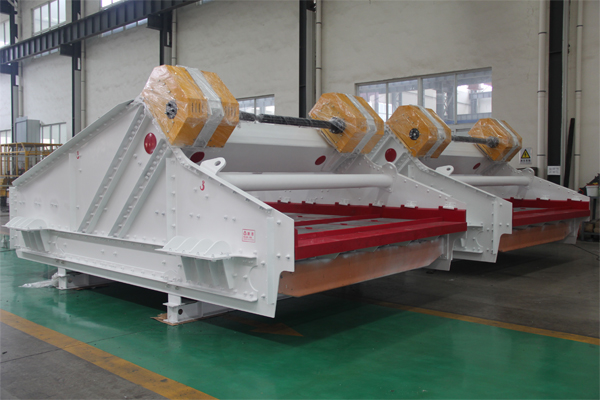
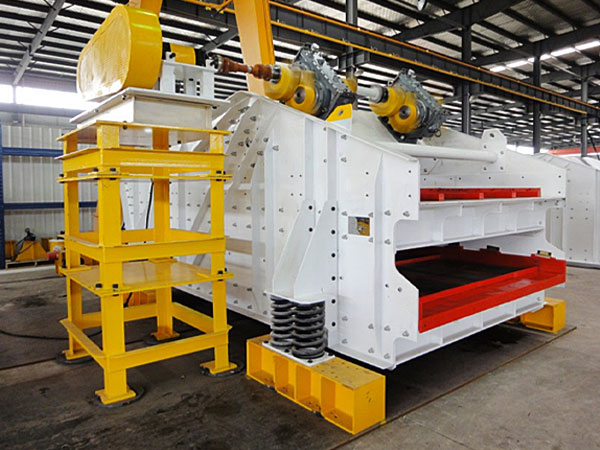
Installing and debugging a banana vibrating screen involves several critical steps to ensure its proper function and longevity. Banana screens are designed with multiple inclination angles, decreasing from the feed to the discharge end, which helps maintain a relatively constant material bed depth and high travel velocity.
How to install and debug a banana vibrating screen
Banana Vibrating Screen Installation
1. Preparation:
Inspect the Equipment: Before installation, thoroughly check the new vibrating screen for any damage during transit, such as rusted bearings, aged seals, or structural deformities. Replace any damaged parts.
Lubrication: If the vibrator was injected with anti-rust oil at the factory, replace it with the appropriate lubricating oil before operation.
Site Preparation: Ensure the foundation (concrete or steel structure) is level and sturdy. If storing outdoors before installation, place the screen stably on sleepers at least 250mm off the ground and cover with a rainproof tarpaulin.
2. Assembling the Screen:
Support/Hanging Device: Install the support or hanging device according to the provided component and installation diagrams. Level the foundation first.
Springs: Carefully select springs based on their marked stiffness values and install them to ensure they are vertical and not twisted. The force of the vibration isolation springs should be uniform. Measure spring compression; the two sets of springs at the feeding end should have the same compression, and similarly for the discharge end. Compression at the feed and discharge ends can differ.
Screen Box Connection: Connect the screen box to the support or hanging device. Adjust the screen box to the specified inclination angle. For hanging screens, adjust both the inclination and the level of the main axis simultaneously, typically correcting the horizontal level first to eliminate deflection.
Motor and Belt Installation: Install the motor, ensuring its foundation is level and its horizontal position is corrected. The center lines of the two belt wheels’ grooves must coincide. Adjust the tension of the triangular belt to be appropriate.
Screen Surface: Install and fix the screen surface according to requirements, ensuring it is evenly tensioned to prevent local vibration.
Connections and Lubrication: Check all connecting parts (screen plate, vibrator, etc.) for secure fastening. Verify lubrication of the transmission part. Ensure motor and control box wiring is correct. Manually turn the transmission part to check for normal operation.
Clearance Check: Confirm that the feed and discharge chutes and the funnel under the screen have no collision points with the screen during operation.
3. Test Run (No Load):
Duration: The initial empty run should be no less than 8 hours.
Observation: During this period, observe:
Smooth and quick startup.
Stable vibration and operation, free from special noise.
Amplitude meets requirements (check with an amplitude plate).
No swaying of the screen box. If swaying occurs, check for excessive spring height difference, uneven wire rope tension, non-horizontal rotation axis, or overly tight triangular belt, and adjust accordingly.
Bearing temperature should gradually increase and then stabilize, not exceeding 75°C, with a temperature rise not exceeding 40°C.
Post-Run Check: After 2-4 hours, stop the machine and check for any loose connecting parts. Tighten any loose parts before restarting.
Banana Vibrating Screen Debugging
Debugging a banana vibrating screen often involves identifying the root cause of abnormal operation and making precise adjustments or replacements. Here are common issues and troubleshooting tips:
1. Abnormal Vibration/Excessive Vibrations:
Causes:
Unbalanced Screen/Load: Improper or uneven material distribution.
Loose Bolts/Fasteners: Over time, bolts can loosen.
Worn Bearings: Bearings can wear out, leading to instability.
Spring Issues: Damaged, failed, or unevenly compressed springs; springs not on the same horizontal plane.
Eccentric Blocks: Inconsistent angle of eccentric blocks, or incorrect weighting.
Screen Plate: Loose screen plate.
Solutions:
Balance & Tighten: Ensure even load distribution. Regularly inspect and tighten all bolts and fasteners.
Springs: Replace damaged springs, adjust spring support to be on the same horizontal plane, and ensure consistent spring compression and appropriate stiffness.
Bearings: Replace worn bearings promptly.
Eccentric Blocks: Adjust the angle of the counterweight to be consistent. If using a vibrating motor, adjust the angle of the eccentric block at both ends of the motor shaft (smaller angle = greater vibration).
Screen Plate: Check if the sieve plate is well fixed.
2. Poor Screening Effect/Material Flow Issues:
Causes:
Clogged Sieve Holes (Blinding): High mud or water content in raw material; fine or sticky particles.
Worn Sieve Mesh: Screen mesh worn after long-term use.
Uneven Feeding: Material not distributed evenly across the screen.
Incorrect Vibration Parameters: Amplitude too small, incorrect frequency, or improper throw angle.
Insufficient Screening Area: Screen too small for the volume of material.
Sagging Mesh: Improper tensioning or wear.
Solutions:
Blinding: Clean sieve holes. Adjust spray water and inclination angle. Consider anti-blinding devices (bouncing balls, slider rings). Adjust moisture levels.
Worn Mesh: Repair lightly worn mesh; replace severely worn mesh.
Feeding: Regulate feed rate to avoid overloading and ensure even distribution.
Vibration Parameters: Adjust amplitude by changing eccentric weights. Check motor speed and VFD settings. Adjust exciter/motor position or motor synchronization for correct throw angle.
Screen Size: Reduce feed rate or consider a larger screen if capacity is an issue.
Mesh Tension: Ensure mesh is properly tensioned across the entire surface.
3. Overheating Bearings:
Causes:
Lack/Excess/Poor Quality Lubricant: Insufficient, too much, or improper lubricating oil.
Bearing Radial Clearance: Radial clearance too small.
Gland Pressure: Gland firmly against the outer ring of the bearing, inhibiting heat dissipation.
Damaged Seal Ring: Prevents proper lubrication.
Solutions:
Lubrication: Regularly check and replenish lubricating oil that meets requirements. Do not overfill.
Bearing Type: Use bearings with appropriate radial clearance.
Gland Adjustment: Adjust the gasket between the end cover and the bearing seat to ensure proper gap for heat dissipation and axial movement.
Seal Replacement: Replace damaged seal rings.
4. Noise Issues:
Causes: Worn bearings, under-tightened screens, loose bolts, loose/damaged springs, structural damage.
Solutions: Replace worn bearings, tighten screens, secure loose bolts, replace damaged springs, inspect for and repair structural damage.
5. Structural Damage (Cracks, Broken Beams):
Causes: Prolonged operation at critical frequency, loose high-strength bolts, severely deformed springs, significant height differences between left and right sides, large weight error in eccentric blocks, metal fatigue.
Solutions: Replace damaged parts, tighten bolts, repair cracks (drill holes at crack ends to prevent extension, preheat and repair weld, add reinforcement plates). Avoid opening holes and welding accessories on the screen frame to prevent stress concentration.
Regular Maintenance is Key:
To prevent many of these issues, adhere to a regular maintenance schedule, including:
Daily: Visual inspection for obvious issues.
Weekly: Check bolts for looseness, inspect rubber springs, and screen surface for damage or enlarged holes.
Monthly: Check screen frame structure and welds for cracks.
Annually: Overhaul vibrator, clean thoroughly, replace pitted or broken rolling bearings. When reassembling, ensure eccentric blocks are in the same phase.
Lubrication: Grease moving bearings regularly (typically daily) to purge old grease and introduce new. Change oil every 1000 operating hours if applicable.
By following these installation guidelines and being proactive with debugging and maintenance, you can ensure the efficient and reliable operation of your banana vibrating screen. Always refer to the manufacturer’s specific instruction manual for detailed procedures and parameters relevant to your particular model.