In today’s highly competitive industrial environment, manufacturers are under constant pressure to improve efficiency, reduce production costs, and maintain consistent product quality. As material handling plays a crucial role in nearly every production line, the demand for reliable and accurate screening equipment has grown significantly. Among the many screening solutions available, the industrial linear vibrating screen stands out as one of the most efficient, versatile, and cost-effective options for modern factories.
This enhanced guide explores how linear vibrating screens work, why they are favored across multiple industries, and how companies can benefit from integrating this technology into their production processes.
What Is a Linear Vibrating Screen?
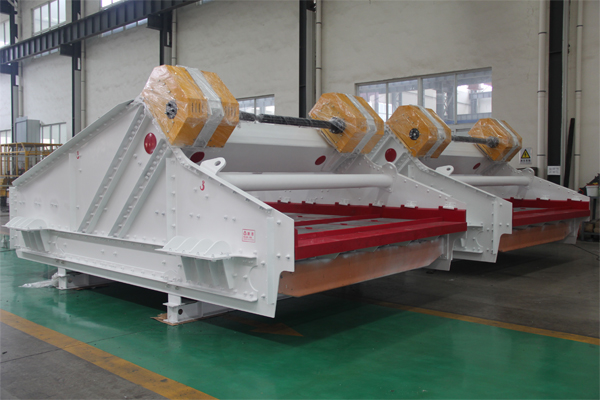
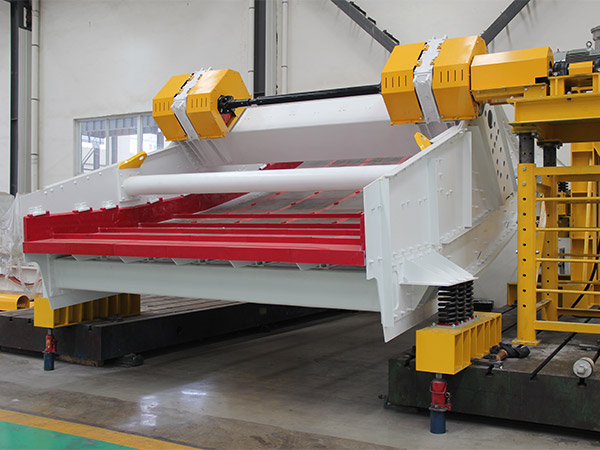
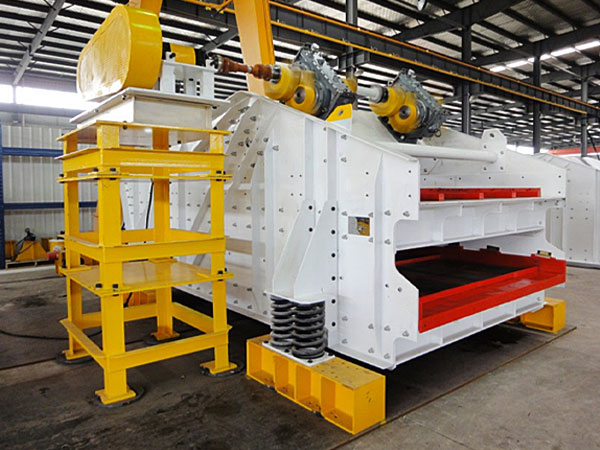
A linear vibrating screen is a high-efficiency material screening machine driven by two synchronized vibrating motors. The motors generate a linear motion, causing materials to move in a straight line across the screen surface. This motion promotes even material distribution and efficient particle separation.
Key features include:
Linear motion for accurate and stable screening
Ability to handle fine powders, granules, and larger materials
Multi-layer screening options for classification
High throughput with low energy consumption
Durable construction suitable for demanding industrial environments
Because of these features, linear vibrating screens are widely used in mining, chemical production, food processing, metal manufacturing, construction materials, and recycling industries.
Why Linear Vibrating Screens Matter in Modern Manufacturing
Material screening directly influences product quality, processing speed, and overall production efficiency. A reliable screening system helps prevent quality issues, reduces equipment wear, and lowers operational costs. For industries where material size, purity, and consistency are crucial, a linear vibrating screen becomes a key component of the production line.
Below are the most significant advantages of using this equipment.
1. Exceptional Screening Accuracy and Performance
One of the primary reasons companies choose linear vibrating screens is their outstanding screening accuracy. The linear motion ensures that material travels evenly across the screen deck, reducing accumulation and maximizing contact with the screening mesh.
Benefits include:
Consistent particle size separation
Reduced screen blocking or clogging
Higher throughput with stable performance
Better efficiency for fine material classification
This level of precision is essential for industries such as pharmaceuticals, food processing, and chemical production, where product uniformity is non-negotiable.
2. Versatility for Multiple Industrial Applications
Unlike other screening equipment designed for specific materials, industrial linear vibrating screens can process a wide range of materials—wet or dry, fine or coarse, fragile or abrasive.
Typical application scenarios:
Mining & Minerals: Sorting ores, stones, and aggregates
Chemical Industry: Screening powders, granules, and catalysts
Food Industry: Classifying sugar, spices, grains, and additives
Metal Processing: Sorting metal powders and scrap material
Recycling: Separating plastics, rubber particles, glass, and waste materials
This versatility allows manufacturers to use a single screening solution across multiple production lines or product types, maximizing equipment ROI.
3. Robust Construction for Long-Term Durability
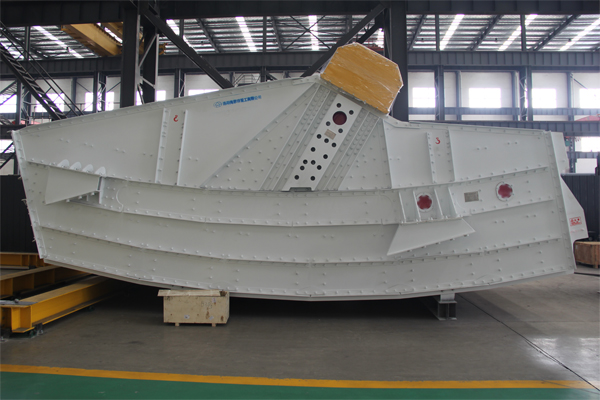
Linear vibrating screens are engineered to operate under continuous, heavy-duty conditions. The combination of reinforced frames, wear-resistant screen decks, and high-strength vibration motors ensures stable operation even under extreme workloads.
Durability advantages:
Lower failure rates
Less downtime for repairs
Reduced long-term maintenance costs
Long service life even in harsh environments
This makes the linear vibrating screen a reliable choice for factories operating 24/7.
4. Reduced Energy Consumption and Operational Costs
Energy efficiency is a critical factor in modern manufacturing, and linear vibrating screens offer a clear advantage in this area. Their optimized motion pattern and simple mechanical structure require less power compared to rotary screens or circular vibrating screens.
Key cost-saving benefits:
Lower electricity consumption
Fewer components that require lubrication or replacement
Reduced labor time for maintenance
Overall lower operational cost per ton of material processed
For manufacturers managing high volumes of material, these savings add up significantly.
5. Easy Integration with Existing Production Systems
Another major benefit of linear vibrating screens is their adaptability. They can be easily connected to conveyors, hoppers, crushers, grinding mills, packaging equipment, or automated systems with minimal modifications.
What this means for manufacturers:
Faster installation and commissioning
No need for major plant restructuring
Smooth integration into automated production lines
Consistent workflow without process disruption
This flexibility makes linear vibrating screens an ideal choice for upgrading existing facilities.
6. Improved Product Quality and Process Control
Product quality is heavily influenced by the accuracy of material classification. The linear vibrating screen ensures that only materials meeting the required specifications move forward in the production process.
Quality improvements include:
Removal of oversized or undersized particles
Higher product purity
Better consistency in final output
Reduced waste and fewer rejected batches
This is particularly important in industries such as food and chemical manufacturing, where product compliance and strict quality standards are essential.
7. Lower Noise and Safer Operation
Modern linear vibrating screens are designed to offer improved workplace safety and reduced environmental impact. With upgraded vibration motors, sealed structural design, and noise-reduction materials, these screens provide safer and quieter operation compared to older models.
Safety benefits include:
Lower noise levels for worker comfort
Stable vibration that reduces structural stress
Improved dust control options
Reliable overload protection
These features contribute to a safer and more efficient working environment.
Comparison: Linear Vibrating Screen vs. Circular Vibrating Screen
Many buyers compare linear and circular screens before making a purchasing decision. Here’s how they differ:
|
Feature
|
Linear Vibrating Screen |
Circular Vibrating Screen |
|
Motion Type
|
Linear |
Circular/Elliptical
|
|
Accuracy
|
Higher |
Moderate
|
|
Suitable Materials
|
Fine to large particles |
Medium-sized materials
|
|
Energy Consumption
|
Lower |
Higher
|
|
Maintenance
|
Easier |
More complex
|
|
Throughput
|
High |
Medium
|
| Ideal Applications |
Industrial, mining, chemicals, food |
Construction, small-scale screening
|
For industries requiring fine and precise screening, the linear vibrating screen is generally the superior choice.
How to Choose the Right Linear Vibrating Screen for Your Factory
When selecting a screening machine, manufacturers should consider:
✔ Material type and characteristics (particle size, moisture content, abrasiveness)
✔ Required screening accuracy (single layer, multi-layer, fine mesh requirements)
✔ Expected capacity and production volume
✔ Environmental conditions (dust, humidity, temperature)
✔ Integration with existing systems
✔ Energy efficiency and long-term cost
A well-chosen linear vibrating screen can significantly improve operational efficiency and product quality.

Linear Vibrating Screen FAQ
1. What is a linear vibrating screen used for?
A linear vibrating screen is used for precise material separation and particle classification. It is widely applied in industries such as mining, chemical production, food processing, metal manufacturing, and recycling. The equipment efficiently separates materials based on size, removes impurities, and ensures consistent product quality.
2. How does a linear vibrating screen work?
A linear vibrating screen operates using two synchronized vibration motors that generate a linear motion. This motion moves materials forward in a straight line, allowing particles to fall through the screen mesh based on size. The linear movement ensures uniform material distribution and stable screening performance.
3. What materials can be processed with a linear vibrating screen?
Linear vibrating screens can handle a wide range of materials, including:
Fine powders
Granules and pellets
Wet or sticky materials
Large aggregates
Recycled materials
Its versatility makes it suitable for both lightweight and heavy-duty industrial applications.
4. What are the advantages of linear vibrating screens?
Key advantages include:
High screening accuracy
Energy-efficient performance
Low maintenance and long service life
Easy integration with production systems
Ability to process multiple material types
Stable and low-noise operation
5. What is the difference between a linear vibrating screen and a circular vibrating screen?
The main difference lies in the motion pattern.
Linear vibrating screens move materials in a straight line, offering higher accuracy and better performance for fine materials.
Circular vibrating screens use circular motion and are typically used for medium-coarse materials.
Linear screens usually have lower energy consumption and higher precision.
6. How do I choose the right linear vibrating screen for my application?
You should consider:
Material type and particle size
Moisture content and flow characteristics
Required screening accuracy
Desired capacity and throughput
Number of screen layers needed
Compatibility with existing production equipment
Consulting with a professional supplier can help you select the best configuration.
7. How often does a linear vibrating screen require maintenance?
Maintenance is relatively simple and mainly involves:
Regular inspection of vibration motors
Checking screen mesh tension and wear
Lubricating bearings as required
Cleaning the screen surface to prevent clogging
With proper care, linear vibrating screens offer long service life and minimal downtime.
8. Can a linear vibrating screen handle wet materials?
Yes. Linear vibrating screens are suitable for both dry and wet materials. For wet screening, manufacturers may use stainless steel screen meshes or anti-blocking designs to ensure smooth operation and prevent screen clogging.
9. Are linear vibrating screens energy-efficient?
Yes. Their direct linear motion and simple mechanical structure result in lower power consumption compared to rotary or circular screening equipment. This makes them an energy-saving choice for large-scale industrial material processing.
10. Can a linear vibrating screen be customized?
Absolutely. Many manufacturers offer customization options such as:
Different screen sizes and layers
Stainless steel or carbon steel construction
Dust covers
Variable vibration amplitude
Integration with conveyors or feeders
Customization ensures optimal performance for specific material processing needs.
Conclusion
The industrial linear vibrating screen is an essential piece of equipment for any manufacturing process that requires efficient, accurate, and reliable material screening. Its combination of high precision, versatility, durability, and energy efficiency makes it a smart investment for modern factories aiming to optimize production and stay competitive.
Whether used for mining, chemical processing, food production, or material recycling, linear vibrating screens continue to deliver superior results across industries worldwide. For manufacturers looking to enhance workflow efficiency, reduce operational costs, and improve product quality, integrating a linear vibrating screen into the production line is a highly effective solution.
